Welcome to my musings on whatever topic catches my eye, plus stories, recipes, handyman tips, welding, photography, and what have you. Oh, and analog/digital hardware design, and software. Please comment on the blog post so everyone who visits can see your comments.

Tag: baking

Kriegskuchen (War Cake)

Back in 1963, my Aunt Annie, who was at that time 90 years old, gave me a recipe she had gotten from her mother for an unusual cake she learned to make as a child in Germany. She called it Kriegskuchen, which translates as “War Cake”. It was called this because it’s easy to make and does not require butter, or eggs, or oil, which are in short supply during a war. For those of you on a low-calorie or low-fat diet, or for those with an egg allergy, this is just what you were looking for.

Kriegskuchen (War Cake) 1

My mother made this cake often during the year all through the 1960’s and 70’s, and especially around Christmas. The flavor of the standard recipe is Christmas-like, but the recipe is flexible. I’ve continued the tradition for many years, and experimented a lot with variations on the original recipe. Around Christmas I bake and ship these cakes in various flavors to my friends and kids. I thought I’d share it here.

Kriegskuchen (War Cake) 2

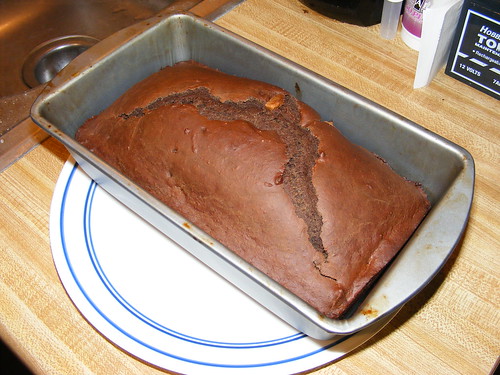
All of these cakes are baked in a standard bread pan. The recipe I got from my aunt was in grams but my mother converted it all to more convenient units.

Original Recipe:

2 cups flour
3/4 cup cocoa (Hersheys)
3/4 cup sugar
2-1/2 tsp baking powder
1 tsp ground cinnamon
1/4 tsp ground cloves
1/2 cup raisins, currants, or diced dried apricots soaked in water for 12 to 24 hours until they swell up.
1-1/4 cup milk (measure precisely)

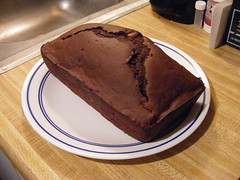
Whisk together all the dry ingredients. Then add the milk and mix with a spatula until everything is wetted. The batter is thick and pasty so it takes some effort to fold and mix. The moisture content of flour varies so sometimes you need to add a tiny bit more milk. There should be no dry flour or cocoa visible. Then scoop it all into a greased breadpan and bake at 350F for one hour. Remove from oven and allow to rest for five minutes. Turn out on a cake rack to cool off.

Kriegskuchen (War Cake) 3

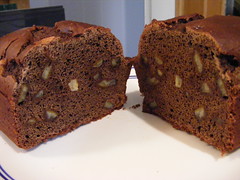
Next, we can get creative and have some fun with this cake. If you want a super chocolaty cake add one cup of chocolate chips to the original recipe, or add one cup of peanut butter chips, or 50/50. Adding a teaspoon of vanilla changes the taste. Omitting or reducing the cloves changes the taste.

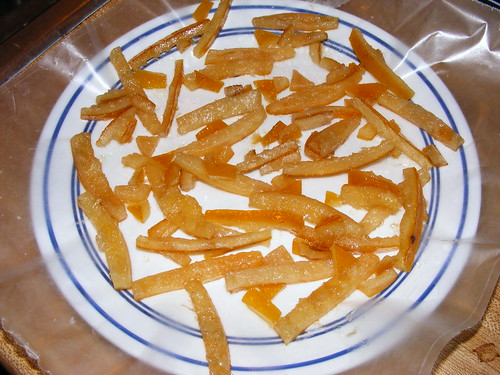
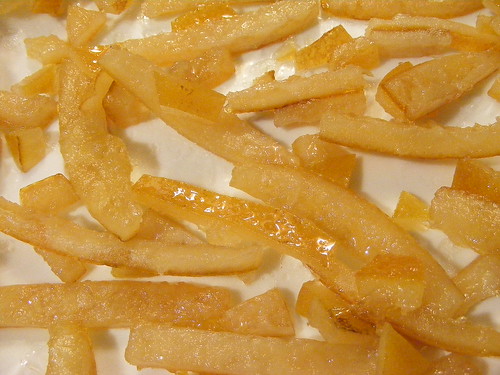
Or, we can substitute other fruits for the currants/raisins. Elsewhere in my blog you will find a recipe for candied orange peel. Candied orange peel combined with the chocolate makes a heavenly flavor. If you really want to go crazy add candied orange peel and chocolate chips. Wow.

Or, we can omit the cocoa. For this variation, omit the cocoa, reduce the milk to one cup, and be sure to add one or one and a half teaspoons of vanilla. You can add just about any candied fruit you like. About one cup does the job. My son-in-law’s favorite is a version made with candied pineapple and no cocoa. For this, I purchase cans of small diced pineapple wedges and I candy them the same way as the orange peel recipe elsewhere in my blog.

Have fun with this low-cal, non-fat cake. Depending upon the ingredients, calorie count for the whole cake varies from 1,400 to 1,800 calories except for the super chocolaty chip version above that comes in around 2,900 calories.

Making Candied Orange Peel


Making candied orange peel is easy once you learn what to watch for. Expect a couple of spoiled batches where you undercook or burn the product, but after that it’s straightforward.


Candied Orange Peel

The number of oranges to use is hard to specify. I eat two oranges a day and save the peel. Since I want as many long 1/4 to 3/8 inch wide strips that are 2 inches long, I cut the oranges in half and juice them or quarter them and carve out the inside (and eat it). Then I wash the peels under running water, and scrape as much of the meat off as I can and then toss the peels into a sealed plastic bin I have in the refrigerator. The sealed bin has a small amount of water on the bottom to keep them hydrated, otherwise the refrigerator will dry them out and they’ll shrivel.

When I have “enough”, I get the cutting board and start slicing as many long pieces as I can and I dice up the odd pieces, and continue until I have enough to fill a small 16 cm stainless saucepan about 3/4 full (but not more).

Next, the peels optionally get boiled in the saucepan. Boiling them like I describe here will reduce the flavor and remove bitterness. It will also help to hydrate any peels that have dried and thinned. You can skip the boiling steps here for a stronger orange flavor. If I’m going to use the peels for baking I skip the boiling to get a stronger flavor. To boil the peels, fill the saucepan with water, and boil for 10 minutes or more, dump them into a strainer and hit them with cold water. Then back in the pot to boil again for 10 minutes or so, dump and rinse with cold water.

Next comes the candying step. Put 2 to 2-1/2 cups of sugar in the saucepan and 1 cup of water, bring it to a boil and dissolve all the sugar. Be careful from here on because the sugar syrup will be at 240 degrees F. Treat it with respect because it WILL hurt you–think napalm. Gently add the peels to the boiling syrup, bring back to a boil, then reduce to medium heat and cook them in the syrup (uncovered). I’ve seen recipes that say to cook for 20 minutes. Forget that. It takes 40 to 45 minutes of cooking. The whole time it will be merrily bubbling and foaming. Stir occasionally to make sure nothing is sticking or burning. When you get to around 40 minutes, you’ll notice the amount of liquid is getting less and less and now is where you really have to pay attention. You want the peels to get that “glassy” candied look–not all the way through, but you want to see the flesh start to get glassy. Some people say to boil until all the syrup is gone. If you do that, you’ll burn the peels. There’s a fine line where they are “just right” and it always seems to come at around 45 minutes.

While it’s cooking, I put out sheets of waxed or parchment paper. When the decision point comes, dump the contents of the pot into a metal screen strainer (remember it’s at 240F which will melt some plastics) and let it drain for a minute. Then spoon them out onto the waxed paper and as quickly as you can spread them out so they are touching each other as little as possible. When they cool they will stick together. It’s pretty easy to unstick them from the paper but not from each other. Then let them cool off and dry for a while, an hour or two, and then you can use them or cover with another sheet of waxed paper. You can stack several batches on top of each other and store them like this for several days.

Finally, you can sprinkle them with flour and mix them into a cake. You can dip the long ones in melted chocolate (just like strawberries). You can coat them with powdered sugar, use then to garnish ice cream, whatever.

To try this out I’d recommend starting with four oranges worth of peel. The thickness of orange peels varies a lot so it’s hard to say how many oranges you need. Thick skinned oranges are great for this application. Oranges with very thin skins are not good choices for candying. You can also do this with grapefruit skins for a very different flavor.

For me, candied orange peel is one of the greatest flavors on earth, and it’s extra fun to make because you are using what would otherwise be garbage plus about 20 cents worth of sugar. However, it is labor and time intensive.

Candied Orange Peel
Closeup of finished candied orange peels.

© 2024 Shuttersparks

Theme by Anders NorenUp ↑

Find me on Mastodon